This guide is to create a side menu(hereinafter referred to as sidebar).
There are two simple steps to create a side menu:
- Create a Menu
- Create a Sidebar
From there content can be added to the new menu and the sidebar can be added to any number of pages(except the home page).
Click here skip ahead to the Update a Side Menu’s Content Guide.
Create a Menu
Menus are the base structure of a sidebar. Mutlple menus can be added to a single sidebar.
Menus can support: ballygarns.ie webpages, external links(Custom links), downloadable files and submenu labels(Custom link with a hash as the link).
- Navigate to Appearance > Menus
- Click create a new menu
- Add the unique menu name to the Menu Name field.
- Click Create Menu.

Create a Sidebar
Sidebars are containers that can hold menus.
- Navigate to Appearance > Widgets
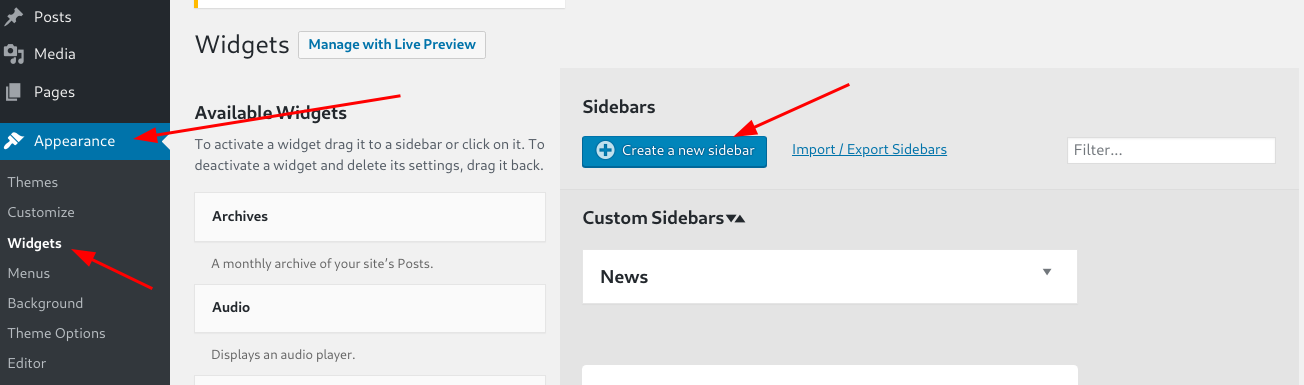
- On the right, click Create a new sidebar.
- Give the New Custom Sidebar a unique and relevant Name and a Descritption.

- Click Create Sidebar.
- The new sidebar will appear under the Custom Sidebars heading.
- Click Custom Menu
- A dropdown will allow you to select the sidebar that was just created(In this example the newly created sidebar is called My new sidebar).
Click the sidebar name to highlight that sidebar item. - Click Add Widget.
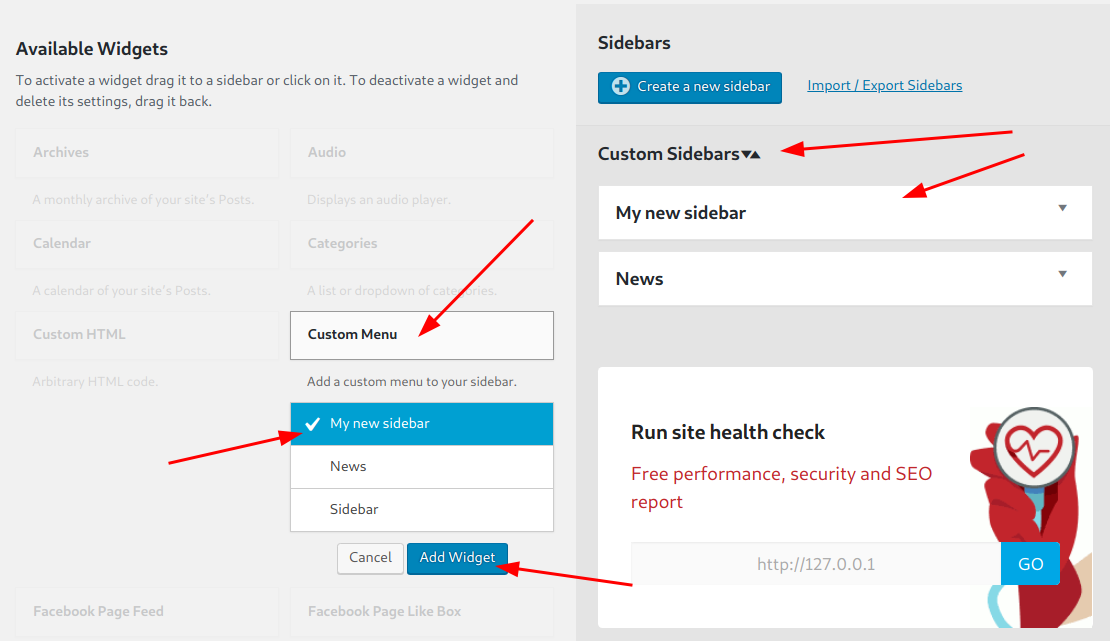
- Under The Custom Sidebars heading, in the panel with the title My new sidebar(In this example the newly created sidebar is called My new sidebar) a new panel called Custom Menu will be added.
- A Title can be given.(optional)
- Then select the menu you would like to add to this sidebar, this menu was created in the Create a Menu guide above.(This example the menu will be called My Menu 1)
- Click Save
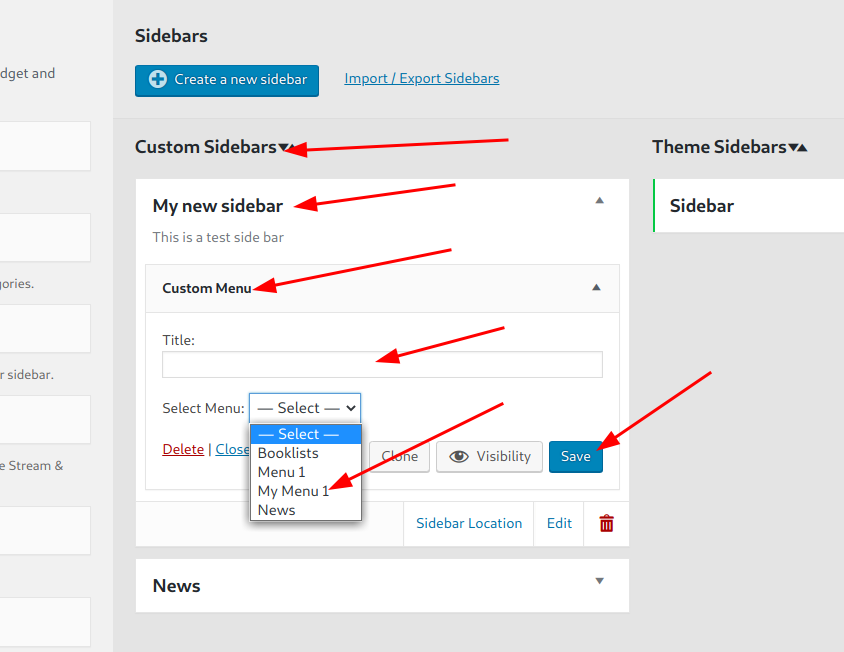
- If you would like to add more menus, repeat steps 6 – 12.
Next step is to add content to the menu: click here to go to the Update a Side Menus Content Guide.